Friday, August 24, 2018

Fall Decorating In the Kitchen & NEW Autumn Products


Autumn is almost here! I'm so excited, as it's my favorite season. I adore pumpkin spice everything to eat, the colors, the leaves changing, the holiday spirit beginning and the love and family atmosphere. My family was out and about yesterday and it was in the low 70's with a gorgeous breeze and we had a great walk together in the fresh air! 

Today I have some lovely new fall items in the shop to show you, as well as an easy tip for keeping your kitchen clutter free and decorated for Autumn this season (or any season). Let's go!

*        *        * 


 Does your kitchen table ever look like this? 

In our home, the kitchen table serves as a drop zone and work space for the entire family. This is where I quilt and create my products, cook our meals, where my dad leaves his work tools, and the family dumps off their belongings before and after work. We try to manage it, but clutter can pile up quickly with six people coming and going! 
My guess is your home probably looks like this, too, from time to time. So to keep the clutter from piling up, I have a solution for my own family and for yours too! A table runner is not only useful in the kitchen or dining room, but it also serves as a beautiful decoration and focal point. Best of all it becomes a clutter stopper! 

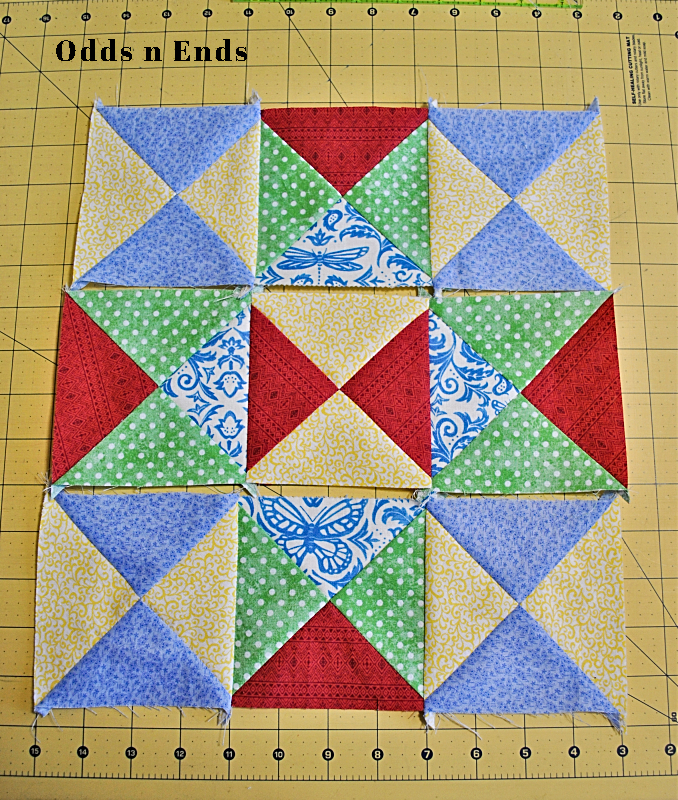
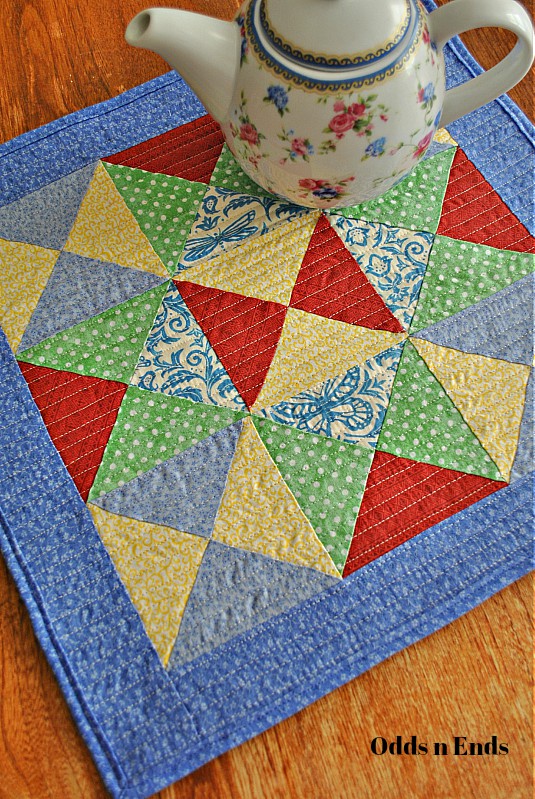
This is the Cascading Triangles Table Runner

Putting all the fall fabrics together reminds me of floating leaves through the air. I've quilted rows of leaves up and down the runner.
You can see additional images for this and all products in my shop.


Every home ought to have a cheerful, colorful table runner on the kitchen or dining room table. It adds so much character to a room! Table runner's keep clutter from piling up on empty surfaces and everyone loves sitting down to eat around the table together...it's so inviting! Plus they are such a beautiful and simple design feature to the home without any extra effort. And of course they are easily removable when ready to get to crafting, as I do. ;) The best part is you can use them year after year, season after season...and exchange them when you are ready for a different style.

Leafy quilted rows in burgundy thread


Autumn has SO much color and so many delights! I not only wanted fall on the table runner, but in a sweet little display to make it feel more homey. I purchased these decorations at Joann's and wood stained the signage with a sponge and acrylic paint we had on hand (no special expensive paints needed). The most expensive was the vase. I couldn't leave the store without it...it's perfect. ;D You can find seasonal items and inspiration anywhere! Place some colorful Autumn leaves from the backyard in a mason jar or wooden bowl. Display a few small pumpkins and gourds in different colors. Have fun with it! It doesn't have to be expensive and you can make it completely personal to your family and style.


I wanted to share another decorating option with this runner... so here is #2!
This display is made up of items from around my room. I don't remember where I found these adorable squirrels. I believe they may have once belonged to my grandmother. They sit on my bookcase near my woodland animal stories, usually. ;) The candle my mother bought me from the $1 store. And the fall decorations I purchased from Joann's for $2! It was so simple and inexpensive.

*        *        * 

Autumn in the Shop!

Now I have to share with you the charming new items in the shop for fall. I'm so excited to show these to you and I hope you love them as much as I have enjoyed making them. :D Besides Cascading Triangles, there are a few more lovelies for you all...

Scrappy Autumn Diamonds

*apple cake not included. Lol! ;D

When various fabrics are used together...that makes it scrappy! Luscious greens, sunny yellows, ruby reds, and some woodsy browns get together on this fun diamond design runner. The scrappy border adds an extra fun pop of Autumn. Simply quilted with some squiggles and bordered with a lovely burgundy red. It's a little bit country, a little bit fall...without being overstated.

I have to share this apple bundt cake with you all. I had my first fall cravings last week and baked up this really easy and scrumptious cake from a favorite blog, Cookies & Cups. I used red delicious apples...it's what we had on hand. I think the granny smith apples would have made it a bit tangier and less sweet. I was really looking forward to the brown butter frosting she uses in the recipe, but we were OUT of powdered sugar!?! The only thing I forgot to check on the list. Lol. But it was seriously amazing without it and fabulous on it's own. We loved it and ate it up!

The backing on this one is a favorite! And all of my products include my permanent sewn-in washing instructions tag for easy cleaning when needed.
You can see additional images for this and all products in my shop.


Football Mug Rug

Whether you are a football fanatic or just love football food, this mug rug is great all year round. And no matter which team you cheer for, you can have fun with this mug rug in neutral team colors and fun design. This is an excellent guy-friendly and kid-friendly gift!
*bowl of chili is also not included. But a must for fall, am I right? :D
You can use this as a mug rug with your favorite game-day beverage, or bring it out for football party snacking. That's what I did with this delicious chili. A family favorite recipe!
Most of my mug rugs are 6-1/1 x 10 inches, just big enough for your mug and a snack or two on the side. The backing is green and the quilting is straight and loopy stitches. You can see additional images for this and all products in my shop.
(If you'd like a large order of  3 or more football mug rugs, email me and I will set up a special order of them for you!).

Pumpkin Patch Mug Rug

"Each year, the Great Pumpkin rises out of the pumpkin patch that he thinks is the most sincere. He's gotta pick this one. He's got to. I don't see how a pumpkin patch can be more sincere than this one. You can look around and there's not a sign of hypocrisy. Nothing but sincerity as far as the eye can see."
~ Linus, The Great Pumpkin Charlie Brown ~ 

Pumpkins are a classic favorite of fall. This mug rug has a scrappy feel to it brought out by the pumpkin applique and the border. Every time I look at this mug rug, I crave pumpkin pie and hot apple cider! Quilted with straight, loopy, and zig zag stitching. You can see additional images for this and all products in my shop.

Mother's Delight Wall Hanging - Autumn

My classic Mother's Delight wall hanging pattern in beautiful Autumn tones. The falling leaves and acorns accentuate the stunning star design. The tags are hung on a curtain rod, inexpensively purchased at any local home goods store such as Walmart. Wall hangings create a spectacular wall feature and decor piece for the home. They can hang neatly in hallways, bedrooms, above side tables...anywhere! With my design, you can easily exchange wall hangings out for the seasons and your tastes. 
*curtain rod not included...can be purchased inexpensively in any home goods store such as Walmart.


Quilted in woodgrain style to mimic the blowing of leaves in the wind!
You can see additional images for this and all products in my shop.

*        *        *
There is still more to discover in the shop! 
I've added more of my best-selling Latte and Favorite Brew Mug Rugs, and there are more fall products as well. Plus everyday table runners, table toppers, and pillow covers!


Shop Now!


*        *        * 
Thank you so much for joining me today, and I hope you had as much fun as I did! I would love to hear how you are decorating for fall at your house... do you celebrate full-on Halloween first, or do you wait until September to decorate? What is your favorite fall decorating item you own? :D

Blessings all!
~Rachel~

Tuesday, July 24, 2018

Hourglass Block Tutorial + Easy Star Table Mat


I have a quick and easy tutorial for you all today! I'm going to show you how to make scrappy hourglass blocks and put them together into some fun designs. You'll then have a 12" block you can use for any project like a pillow cover or table mat, as I'm going to show you today, or even make a bunch of them for a quilt! At first mine was going to be a pillow cover, but it was begging to be kept simple. So I just bound it and now it's a cheery table mat for my sister's tea time and bead-crafting and who knows what else! :D


I have a very large scrap pile of fabric, growing larger everyday! I thought it would be fun to show you some quilting tips as well as share this project for those last minute gift ideas we crafter's always need! ;) This pattern is made to be pre-cut/charm-friendly, fat quarter-friendly, and scrap-friendly...so you may use whatever materials you have on hand. I chose to use a combination today.


You'll need:


*All seams will be 1/4-inch unless otherwise noted.

Let's get started!

1. For Fat Quarters or Yardage: cut them down into 5x5 inch squares. How many squares you need will depend on which design you choose...I'll get to that in a moment.

For Scrap Pile: You can't always get a 5-inch square from your leftover pieces of fabric in your scrap pile...at least I can't! I took one of my 5x5 inch squares and cut it into triangles, as I'll show you below. Then I had some too-large triangles left over from another project and simply trimmed them down using a triangle from my cutout 5 inch square as a template for sizing.
I've used a combination of pre-cut charm squares, cutout squares from yardage, and pieces from my scrap pile in this tutorial. What can I say, I love variety! 

2. Cut: With your 5x5 inch square or charm square, cut a diagonal line from one corner to the other, in both directions. You'll have 4 triangles. Do this with each of your 5-inch squares.


A beautiful pile of colorful triangles ready to piece together! 


 3. Choose 4 triangles and set them together as you see below. This is an hourglass block! An hourglass block is one of those basic patterns that when combined together with more hourglass blocks, or other style block patterns, can create a much larger and intricate design.
 
There is SO much you can do with an hourglass block. You can have fun with fabrics and color designs to create a different design! Here are 3 design options you can try if you'd like. I've chosen the star, but you can create a playful scrappy custom design all your own by trying the dual-color hourglass or chevrons designs below. (if you choose the chevrons, you will need to cut along the sides - called "squaring up" - to make an even edge).


Choose where you want your fabrics and colors FIRST, then sew together. That way you'll ensure to have the block the way you want! I chose the green with white dot print to show off the star design. You'll need 36 triangles to create a 12-inch finished block.
 Today we're going to set the hourglass blocks in rows of 3x3 to create a 12-inch star block you can use to create a table mat, pillow cover, or set with more star blocks for a whole quilt! 


4. Sew Triangles Together: Set 2 triangles pattern sides (pretty sides) together...this is called "right sides together". You'll be sewing one short side, on the right there.


To create a perfect 1/4-inch seam allowance, I like to stick a piece of tape down as a guide. To do this, put your needle in the down position. Next measure out 1/4-inch from the needle point and place the tape down at the 1/4-inch mark. When you sew, keep your fabric edge along this line and you'll have a perfect 1/4-inch seam allowance every time!


Stitch a 1/4-inch seam along one short side of your two triangle pieces.


 When doing so many pieces that are all the same size and shape, I like to sew in a continuous strand, without cutting the threads. It gives a little less thread waste and makes things go a bit faster. Just be careful not to mix up the direction of the triangles as you sew when using this method!


 Press your seams to the side, against the darker side of the fabric. DO NOT iron back and forth, as this distorts the fabric shaping. Just press down for a few seconds and lift directly back up again.


Continue sewing until all the triangles are sewn together in sets of two's.

5. Once you have sewn together all your sets of two triangles, it's time to piece the sets together into a block.


To properly put the two halves together, we're going to "nest" the seams together. The pressed seams should rest on opposite sides and fit snuggly and neatly together. The point should match up and then you can pin in place.
You may need to re-press the seams if they do not nest with the seams on either side like this. The dark sides sometimes match up instead of being opposite...just press to the other side and try again.


Pin the nested seams in place in the center, and at each end if you need.


Sew along the length, and continue these steps until all the hourglass blocks are completed. 


You should have a nice little 4-1/4 x 4-1/4 inch hourglass block.


Tip: To help the hourglass blocks lie flat more easily, I like to seam rip the center a bit at the join. Carefully stick your seam ripper in at the join, just above and beside the stitching. You don't want to rip the stitches out, just the material! Then rip in an upwards motion to create a small slit. Press this open to either side so your block is flat and neat.


6. Sewing Rows: Pin two blocks, right sides together along the sides, at the corners. You want to match seams here just like you did earlier...with the seams on the front and back lying to either side at each corner so they nest neatly together. Sew in sets of two for each row. Then add the remaining hourglass blocks from each row, to the end of each row.


You should have three rows sewn together.


Here is a view of the front and back! Everything should look neat and flat.
Press flat the seams you just sewed, as you see below, so the rows will nest neatly together in the following step. Press it - outside, inside, outside. ;)


Next, we're going to clip the corners, or the "dogs ears" as quilter's call them. :D You only do this as the last step, after the seams and blocks are pieced together. Otherwise it's harder to match seams neatly after cutting them off. Now, simply cut just the tips from the inside and outside of the blocks...the part that hangs off the edges as below.


 Lastly, sew these rows together, right sides together.

Congratulations, you should now have a 12-inch block! 

You can turn this into anything you want or even make more blocks.
Or, continue with the directions for a simple table mat!


7. Table Mat Borders: Cut two 12-1/2 x 2 inch strips for your borders. Line up, right sides together...if you have a special direction of the fabrics of your block, these will be the top and bottom strips. Pin at the seams to be careful to keep your seams flat when you sew. Sew borders to your block with a 1/4-inch seam allowance.


Cut two 14-1/2 x 2 inch strips for second border. Line up right sides together. Pin at all seams; stitch with 1/4-inch seam allowance.


8. Quilt: Lay your bordered block on some batting. I use Warm and Natural 100% cotton batting for all my quilting products in my shop and my crafting. Leave a little room on all sides. Lay your yardage underneath your batting, and cut with a little space on all sides past the batting for a backing.
You should now have 3 layers: top, batting middle, and yardage backing. Press your entire block once more to make sure all the seams are nice and flat...and iron the yardage for the backing.


Use curved safety pins to pin through all 3 layers of your table mat.

I was tempted to quilt something fancy for my table mat, but I decided to keep it simple with straight stitching. I used my walking foot attachment for my sewing machine and kept the quilting 1/4-inch apart. I love how it turned out! Even if you are a beginner you can do this! :D


9. Binding: To finish your table mat, you need to make binding to finish the edge. There are lot's of methods for binding, and you may have to practice and test out a few to find something you love. This is an excellent tutorial here on Craftsy.com you may follow to take you from start to finish with some varying methods you can choose from! I make my strips at 1-1/2 inches wide and machine-stitch.

You are finished!

Ta-da!!
A gorgeous table mat ready for tea time or decorating your side table or whatever your heart's desire!


The straight-stitched quilting creates a lovely smooth surface. 
I adore running my hands over quilting. It's so relaxing!


Thank you so much for joining me today! I really hope you'll try the hourglass blocks and create a fun new table mat for yourself, or as a gift! :D


If you enjoyed this tutorial and found it helpful, be sure to sign up for my emails on the sidebar! That way you can receive all my future quilt tips, tutorials, and special offers to my Odds n Ends Quilt Shop! :D
 Be sure to share this tutorial on your favorite social media sites so your friends can make one too!


Blessings to you!
~Rachel~