Monday, July 9, 2018

Summer Sale Starts Now!


Summer is in full swing! That means pool parties, BBQ's, picnics and family time! What's not to love? 

With all those people stopping by, you'll need something like this Retro Kitchen Table Runner to set the mood. I just adore that gingham, don't you? Or add some color to your walls with the Summer Burst Wall Hanging. Now is the time to grab up your favorites before the season changes! ;)


Use Code: SUMMERLOVIN at checkout to receive discount

Start Shopping!


I've had a good start to the summer. So far I've caught up on some business organizing (getting set for the busy fall and Christmas prep ahead! Ahh!). And we have had 2 birthday's, my parents anniversary, and the 4th of July all within the last few weeks. It's been busy! 

My mom, sister and I will be heading to New Jersey to visit with my mom's extended family the end of this month for some summer fun ourselves. I can't wait! We went last year and so enjoyed our time together.

What about you...any summer plans to travel or just kick back and relax? :D

Have a great week,
~Rachel~

Wednesday, June 6, 2018

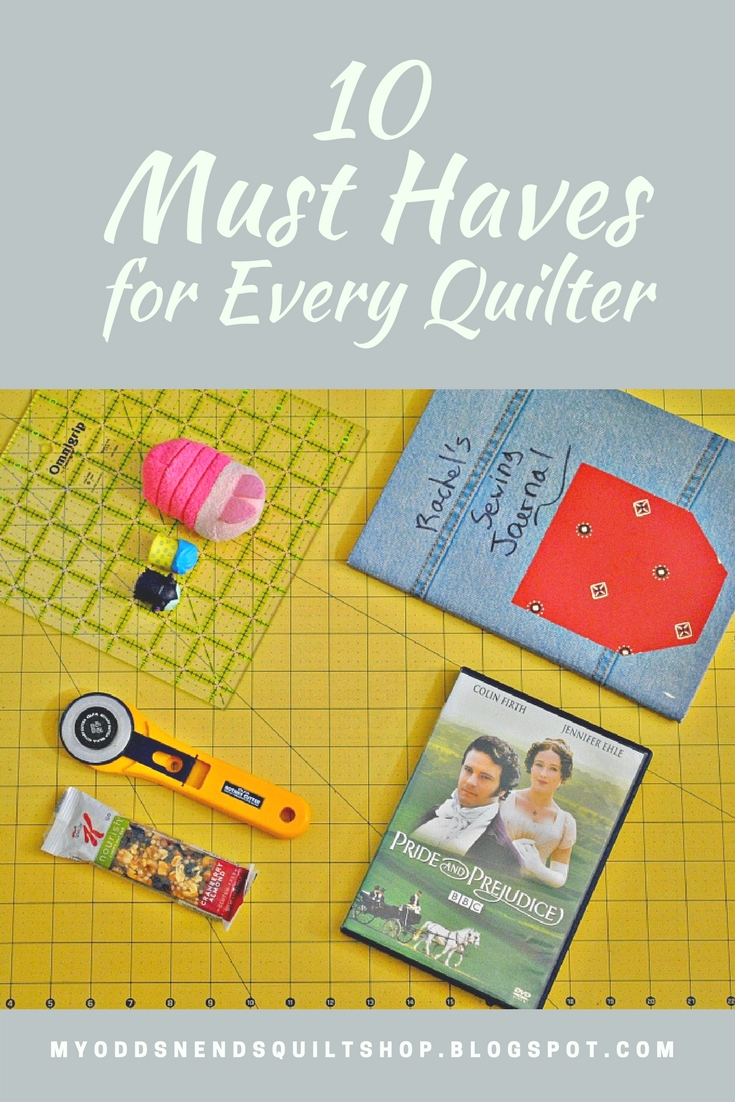
Top Ten Must Haves for Quilters


Here's my top 10 list of what every quilter needs to get started and put in a good day of work! I have a variety of tools and "odds n ends" (see what I did there?) that I like to use. I especially like to keep it fun, because quilting is a process and it can be easy to get frustrated in those moments when you are tired or stuck on something. Now this may not be every quilter's list of "must haves", but it's mine. ;) If you are a crafter, maybe some of these will become your essentials, too!

A perfect balance of work-to-relaxation in the tone of the room goes a long way to making me comfortable and focused enough to make a lot of progress in my work day. I need plenty of light to be able to see the balance of fabric colors, cut evenly, and see when I'm stitching. But there are a few other things that help go a long way in keeping my energy and creativity flowing. 

Here are some of the things I need to put me in work mode!


1. A good sewing machine! Absolutely necessary if you are going to quilt. I do well with my mom's Kenmore sewing machine. It has quilter foot attachments I bought extra for straight and free motion quilting (that's the foot attachment that allows me to create those fun loops and flowers) and allows the feed dogs to drop down (the little grabby things beneath the needle moves the fabric along). This helps to be able to move the material around freely when quilting. You can have a more advanced sewing machine, but I want you to know you can quilt beautifully even with just an average sewing machine!


2. A great workspace - I don't have my own craft room (boo hoo!), so I create a "mood" and do the best I can with my workspace. We have a large kitchen table for our family of six  so it's a great workspace to spread out my tools. Our table opens up to add extra leaves for the table, so my dad cooked up this great quilt table insert for me! I am still working on getting some better storage and organization for my supplies that won't take over our family kitchen, but this works for now. ;) 


I also printed some posters for my little corner. These inspire and encourage me to keep going when the going gets tough. I found mine here on AllPeopleQuilt.com one of my favorite quilty sites (bookmark this site...it's awesome!) and on pinterest. It makes my space feel more personal...instead of just the family's kitchen. ;) 


The point is, you don't need a perfect craft room to do what you love! I was so worried when I began my home quilting business that I wouldn't be professional enough if I didn't have a "real space". This has been what works for me, and my budget and family...for now. :) Don't be afraid to start small. Work with what you've got and make it your own!


3. Inspiration Notebook - I quickly found out I needed something to keep all my design patterns and ideas in. I doodle free motion quilting designs, sketch new pattern ideas, and write out the measurements and instructions for each of my product patterns. My trusty notebook is always within reach in my sewing corner. And when I'm out and about, I have a smaller notebook for when creativity strikes or I remember something I needed to do. My inspiration notebook is a composition notebook that I covered in this fun jeans-print wallpaper (my aunt gets them for us free). I like the lines like this where I can write and doodle if I choose to, but I've seen some quilters using graph paper, too.  


As a beginner or an experienced quilter, a notebook is a must have. You can store all your sketches and doodles and always be able to find those ideas again. And years later, it's fun to see how far you've come in your designing!


4. Rotary Cutter, Mat, and Rulers - If you are going to be a serious quilter and spend a lot of time cutting out all those small pieces, you really have to invest in a rotary cutter and quilting mat. It saves so much time! And there are so many special rulers you can invest in to help with measuring and precise cutting (very, very important when quilting!). You can find all of these items at your local craft store such as Joann's and Hobby Lobby or online. 


If you don't want to go investing in a lot of tools upfront, here are the basics of what I love:
  • I use a large 18x24-inch Fiskars cutting mat, but I also have a small 12x18 Omnigrid mat I use whenever I'm just doing some small piecework on a project. I would definitely invest in the larger mat, as the more space you have to cut on the better. I honestly find myself still running out of room on my cutting mat some days. I like to spread out when I work. ;) 
  • My favorite ruler is my Omnigrid 8-1/2 x 8-1/2 square ruler (they sell a 9-1/2 x 9-1/2 ruler now). It's the perfect size to get you started and great for small piecework and trimming. Then I have my longer Omnigrid 3-1/2 x 24-inch ruler for cutting out binding, trimming fabric edgings, and squaring up larger blocks than my 8-1/2 ruler can manage. Browse their site...there are lot's of options for mats, rulers and rotary cutters!
  • There are many sizes of rotary cutters with varying grips and such for comfort. I use a 45mm rotary cutter without any bells and whistles and it's been just fine for me, even with my carpel tunnel. Try out my easy technique for sharpening those blades and making them last a little longer. This saves so much money!
Some stores carry a pack where you can buy a rotary cutter and mat together and this might be a perfect option for you if you don't plan on quilting often or on any big projects.


5. My table insert - One of the things a quilter needs to create that amazing stitching technique on the quilted items is a flat surface. Whenever I tried quilting without that smooth surface between my sewing machine and the table, my stitches came out wonky and tore at my material! So my dad, the genius that he is, made me an insert for our table. It has a special cut-out where my sewing machine slips in...and a small hole directly underneath where I can slip my fingers to change the presser foot settings (mine are underneath the machine and that's how you set the machine up to create all the fun loops and designs in quilting). This is a wonderful, inexpensive resource for home quilters.

If you are using your standard home machine and don't have a table that can extend in this way, there are small extension tables you can buy to attach to your machine that give you an even surface to quilt on. Look for one that will fit snuggley against your sewing machine before purchasing. If you're interested in investing in something like this or creating your own table, I have a whole post about it here, and a pinterest board for inspiration!


6. Pins, Scissors and the trusty Seam Ripper - Though I had sewn since I was a girl, I quickly found I needed to invest in a variety of new pins when I switched to quilting. You will need long quilting pins for use in piecing your blocks together. These are easier to grip and stick smoothly through layers of thick fabric. You will also need large size 2 bent safety pins to use when ready to machine or hand quilt your project together. The large bent safety pins make it effortless to pin through multiple layers of batting and fabric, and the curve makes it manageable to pin without moving your layers around too much.


Even if you use a rotary cutter, a pair of scissors are still needed for cutting threads and snipping corners from your blocks when trimming. There are a lot of choices and if you already sew then I'd stick with what you have on hand, especially if you purchase a rotary cutter. I use these scissors I purchased from my local craft store and they have held up really well for years. A small pair is nice to keep on hand for snipping thread at the sewing machine. Scissors can be bought in 2-packs as well.

Most quilters and sewers have a love-hate relationship with their seam ripper. If you are not familiar, a seam ripper is used after you've made a mistake and need to re-sew a bad seam. Thus the hate. ;) No one likes to make mistakes, but it comes with the territory. And just because you have a messy seam does not always mean it's your fault. Needing a new bobbin wound, extra lint in the needle or presser foot, or a snag in the thread could be causes as well. We learn from our mistakes, and our snags, and in time your stitches and seams will be straighter, with practice. My seam ripper is always within easy reach...just in case. ;)


7. Music or a Movie - When I'm quilting for long periods of time, I really need something to set a tone in the room and maybe give me a beat to work to, if it includes music. My favorites are period dramas like Pride and Prejudice (lot's of dialogue to listen to) or a musical that doesn't have too much dancing to distract me. For music, I need something with a beat, so my soft stuff is out of the question. Disney soundtracks are fun and light, and I always have my Christian artist cd's on hand...or the radio on.

When you craft and quilt, put on your favorite movie or play that music you hum all day long and get stuck in your head. You want to be relaxed and comfortable when you're crafting. It really works!


8. A Little Friend - If you read my about page or my shop page here on my blog, you'll see mentioned that I live in a pet-free home. So instead of a pet nearby to keep me company, I like to have one of my TsumTsum's made by Disney. There is something about a cute little stuffed toy or figurine that brings that happy, free-spirit to the room that I'm looking for. Since I'm not naturally that kind of person myself. ;) When I'm stressed or struggling with a design, I look over and it cheers me up and relaxes me. My favorites are my Winnie the Pooh characters like Piglet, or my prince charming owl from Sleeping Beauty.


9. Hot Tea and Water - Drink up...because it's essential to stay hydrated. It may seem cheesy, but I've found if I stay hydrated I work more productively. And that is very important to me to make the best use of my time. I don't want to start feeling sick, either! I can get so wrapped up in what I am quilting that I forget to eat properly and stay hydrated. Keeping a glass of water nearby, within reach helps me out. A cup of hot tea relaxes and soothes me and feels like a cup of comfort before I start my day of work. So I almost always have a cup of hot tea in my favorite mug!


A snack can go a long way in helping me make it through a long day of quilting. Quilting can be a lot of standing in one place cutting out pieces, or up and down between the sewing machine and ironing board. And there are the countless, minute decisions of color and pattern being used by your creativity. I usually like to get as much quilting for the shop done as I can in a day, so it's always nice to have something to keep my energy up - and reward myself for all the hard work! Some of my favorites are: a fruit and nut granola bar, Dr. Pepper, tea from Republic of Tea and Tazo tea (love the peach!).


10. A Stack of Favorite Books - A quilter needs inspiration. I'm constantly on Pinterest and scoring books I own and library books for ideas, and to keep up with the latest styles and techniques. There is always something new and exciting to try! Some days I lack creativity and inspiration, so I take out a favorite magazine or book, skim through, and soon I'll find ideas. "Oh, I need to use triangles for the border!" Or I'll find just the right swirl to quilt on a new table runner. Angela Walters free motion quilting books are always among my stash, as well as some block books like the "Farmers Wife" series and this fun one "The Vintage Quilt Revival".


It's good to invest in a book of basic quilt blocks. Even if you use free patterns online, sometimes it's more useful to have additional diagrams and instructions for the basics like a flying geese block or a half square triangle block. These two often become the foundation for a lot of larger block designs. Judy Hopkins "Around the Block" gives me perfect blocks with perfect points every time and has excellent templates for basic blocks in a variety of sizes to suit my needs. I can always find what I'm looking for here.


So I hope you're inspired and encouraged to take up quilting now! :D I know you can do it! Start with what you've got and go from there. If you fall in love with quilting the way I have, you can always extend your tools and supplies as the need and your experience grows. Don't stress, just have fun with it.


What are YOUR essentials when you are working on your favorite hobby? Do you have a special tool you always use or a piece of music you're always listening to? What is it you can't craft without? 


I'd love to hear your favorites!


Friday, May 18, 2018

Feature Friday: Mother's Delight Wall Hangings

Welcome to my Feature Friday! Every week I'll feature new items and products from my shop, new designs, and new patterns. And I might even show some sneak peaks! Get that, it's new and it'll be a blast - come and join me!

Today's feature is the Mother's Delight Wall hanging. 


My mom is one of my biggest supporters. She pushes me to try things and just go for it!
Mom encourages me, challenges me, believes in me, and always cares about me. And she loves everything I create, which is always a confidence booster for this perfectionist. ;) 

I've been making things for my mom forever and she gets almost one of everything I create for my shop. I can't help it, I know she'll love it! When I started quilting I created my first wall hanging especially for her, then made another, then another.

Below is a country style hanging with the year my parents married on it. I used block patterns from the Farmer's Wife book. Great designs in it! I have plans to adapt this one for the shop in the future!


When I opened my shop I wanted to design a wall hanging especially with my mom in mind to dedicate to her and all she means to me. The traditional Mother's Delight wall hanging is created with purples - my mom's favorite color! :D (sorry the colors are a bit "off" in this photo, I'm working on getting a better quality picture).

This original version of Mother's Delight is available here in the shop!


A wall hanging is a beautiful piece of art to showcase in your home. Each of my wall hangings has three hanging tabs at the top to easily slide onto a curtain rod, which you can purchase from any home store inexpensively. This way you can change out wall hangings seasonally! And all of my products include my permanent washing instructions tag on the back.


Now I have two NEW color schemes for you in the shop!
This is Summer Burst. Fresh, vibrant color full of the warmth of the summer sun. I think this has been my favorite to create so far. The colors are so cheery and the fabrics are sweet, but simple, and not too flashy.


I've quilted each section in a different way to add texture and highlight the colors. Bubbles, swirls, diamonds, and loops are just a few of the patterns. When the fabrics and pattern design are simple, that's when I play up the quilting! :D


Mother's Delight Country Scheme is filled with love! ;D Of course!
Beautiful country plaids and heart fabrics are showcased with navy, tan, and burgundy for that homey feel. Then I free-quilted this lovely wall hanging with wavy swirls all over. This version is wonderful year-round for certain.


Love those details!


Thanks for stopping by today for Feature Friday, and I hope you had some fun!
Be sure to stop by my Odds n Ends shop for table runners, mug rugs, these lovely wall hangings, seasonal decor and more! ;)

Don't forget to share on your favorite social media sites!

Follow me on Facebook and Pinterest!


Have a lovely weekend!
~Rachel~

Monday, May 14, 2018

Creating Your Own Quilting Table


Once you begin your quilting journey you start to refine your needs and tools a bit better. You'll know what you use on a regular basis, you'll know your favorite techniques, and you'll have a few completed projects under your belt. But one thing I didn't see enough research about in quilt books and online when I began was the importance of a quilting table. I primarily machine quilt and I struggled through many projects, with sloppy free motion quilting and lot's and lot's of seam ripping before I discovered the trouble wasn't with me, it was my lack of a quilting table! I'll share more of this in a minute.


My dad was a HUGE help and created a lovely and very inexpensive quilting table insert that I use every day I quilt. It's amazing and makes my life so much easier! My quilting table is a board that easily inserts into our dining room table, as you'll see farther below, in a minute.

What is a quilting table?

A traditional quilting table is designed to give you extra space and a flat surface for quilting on your home sewing machine. You always want an even surface between your sewing machine and work surface areas so your heavy quilting won't be dragged down when you quilt the layers together (if you machine quilt, as I do). Ideally, you want one where your sewing machine rests inside the table or cabinet and your machine is even with the with the surface for a smooth surface.

Why do I need a quilting table?

For those of us who don't own a long arm quilting machine that needs it's own room (and is VERY expensive), we need something to help our home sewing machines carry the bulk of the heavy materials as they slide along when we quilt. You need a smooth surface when you quilt, especially when working on a large project. When I first began quilting, I often would have pulled, and messy stitching. Yes, sometimes that was my stitch gauge, but much of the time is was simply that gap of space between the table and my sewing machine!


See how high my machine is from the table? There are at least 4 inches of space above the table to the sewing machine plate there. That's an enormous gap that creates drag when quilting. The larger your quilt project, the more difficulty you will have creating neat stitching this way. You won't be able to move your quilting around freely as you quilt.


Are there different styles of quilting tables?

Absolutely! You can purchase small quilting tables that sit on your table surface. And there are various styles of diy quilt tables and cabinets you can purchase.When deciding on a quilting table for your own home, take into account where you will be doing your quilting, how much quilting you plan on doing in the future, and how large your projects will be.

If you won't quilt often, or on smaller sized quilting projects (not humongous quilts!) then a Sewing Machine Extenders that sit on top of your work surface and extends the sewing area around your sewing machine might be just the thing. These are raised up and better for quilting piecing blocks together than for the majority of bulky quilting, but I've read of many who use this method for their projects too with no trouble.

Then there are actual tables, or cabinets such as these where your machine can sit inside. That's much more what you want if you plan to do a lot of quilting, or work on large projects which are much heavier and weightier. However, not all cabinets are created alike, and if you want one to quilt with be sure your sewing machine not only fits inside, but sits level with the tabletop.A table style such as this became my choice and that my dad made for me. I can work on any project, small or large and have plenty of space to cut, piece, and quilt. There are a variety of cabinets and homemade variety's. I have a collection on Pinterest for inspiration if you'd like to see some more styles - there are some great idea's from other quilters! :D


Here is my quilting table:


My quilting table is our family's dining room table! We have a large table that pulls apart to add more leaves and seating. So all my dad had to do was create an insert to fit my sewing machine. The insert is quite large, a bit heavy but I can manage to place it together myself most days.

This is my insert that measures 24x42 inches to fit into our table and give me space for my sewing machine. You can see where it has been cut out. We measured around my sewing machine, then pencil marked the measurements on the wood. (If your machine comes apart at the front to make it smaller for sewing sleeves and such, be sure to take that OFF before measuring!) I have an old Kenmore so my measurements were: 3-1/2 x 6-1/2 for the very tip of my machine; then a 2-inch depth in the front and about 1-inch depth on the back side, and 7 x 11-1/4 on the long sides. If you look closely, you'll see a small notch on the 1-inch deep spot. That's where the attachment for the end of my sewing machine slides off and connects. Each machine is a little different, and you may need to make some adjustments for your own. :)


We ended by sanding the wood smooth, then shellacking the entire top and along the inside just where my sewing machine would sit. You don't want any splinters or spaces where your cloth can get caught!


To give my sewing machine something to sit on, we made a small stand that sits down inside the gap in the table. This measures 9-1/2 x 18-1/2 inches and is bolted in place underneath. The front section with the gears are is where our table pulls apart.


The hole was an addition we added later and sits directly beneath the area where the switch for my feed dogs is (those little "teeth" under the needle). As a quilter I change the feed dogs constantly from the up to the down position. Some sewing machines have this button or switch on the top where you can reach it easily, but unfortunately mine lie behind and under in the back. I used to have to move the table apart and reach around my sewing machine and under the insert EVERY TIME I needed to change the feed dogs to quilt! Bleck! So my dad drilled me a hole - now all I have to do is reach under and flip the switch! Yes!


Here's another look at how our table is put together - there are small pins on one side where we needed to drill a few matching holes for everything to fit together. This helps keep my insert from sliding apart too much, as well.


If you create your own table in a similar way, make certain your cutting measurements are accurate! The most important thing is to have your sewing machine rest snuggly in the space you created. There should be no gaps, and your machine shouldn't be able to slide around in the hole. Just tight enough to rest against it, but not so tight that you have to force it into place.

I LOVE having a large space to work! The smooth surface makes it easy to quilt everything from piecing blocks to entire quilts without any trouble.


If you are a quilter, I'd love to hear what you use to quilt on...do you use an extender, or some kind of quilting cabinet or table? Or do you hand quilt instead? 

What is your favorite method of quilting?


Thank you for visiting today, and I truly hope this tutorial has been of help to you.
Be sure to follow me on Facebook, Pinterest, and Bloglovin' for the latest news and posts! :D
~Rachel~